
Lesson 4
Lesson 4
1. Beam angle
Angle is arguably the most crucial quality of light. It is the geometrical relation between a source of light, an object and a spectator that tells a story, determines location or creates the proper mood. It is the difference between a waning crescent and a full moon.
The angle of light determines which surfaces of an object are lit, how and where light reflects or can even create an illusion and change the shape of things we perceive. By properly choosing an angle you get to decide what to reveal and what to hide, you get to draw the line between the light and the shadow.
The only way how our brains can recreate a 3-dimensional shape of an object by sight is to analyse which surfaces are lit and which remain in shadow. By combining visual perception and experience your brain will tell you that there is a huge granite ball and that it’s rolling your way.
In this lesson we will explore different angles of light, why and when to use them and how to combine them. Naming of these angles indicates the position of a light source relative to an object and a spectator. It is crucial to remember that the same lighting can appear very different to a spectator located on the other side of an object, above it or beneath it.


1.1 Front light
“The only thing that looks good in front light is the Moon.”
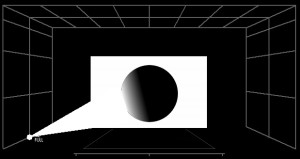
This is your basic angle, often called FOH (front of house). As you might have guessed, front light hits the object from “the front”, which is where a spectator (or a camera lens) is located. It’s what you get when you light up a distant object with a torchlight in your hand. Try it for yourself – every surface you can see is lit evenly and the “dark side” is hidden from your sight.

It causes flattening of the object and there are not shadows on it. For that reason, the light in 45° is used for lighting in theatre, which provides the best depth and volume. Light above the heads of actors help to see clearly eyes and mouths of actors. If the angle of light is too obtuse, disturbing effects may arise. Actor’s face is lit homogenously and it rather seems flat. No distinctive shadows come into existence and modeling is minimal. Actor’s eyes are best visible.
Frontal lighting eliminates shadows and that’s why everything looks flat, almost 2-dimensional. Perception of depth is heavily impaired and it’s hard to see the actual shape of things. Typical example is using a built-in flash on your camera, this is why all of your party pictures look ugly.
For a perfectly frontal lighting you’ll need the source of light right between your eyes – which would be very uncomfortable. In most situations are lanterns located above spectators – on high tripods, under the ceiling or on a balcony of a theatre. This is what we usually mean when we refer to F.O.H. lighting – it’s not so ugly, you get a basic sense of depth and we get rid of those long annoying shadows.

When you light up a stage this way you can argue that your job is done – everything is visible and the rest is up to the actors. Some people will be actually happy with it. But if you consider this lighting boring then congratulations – you’re on the way to become a lighting designer.


Three quarters position. The basic type is the front lighting, FOH (“front of house) indicates the position of the latern relative to the stage, thus the direction of the light from the front side i.e position in the auditorium where the technical apparatus (lights, projection etc.) is oriented towards the stage, in the identical angle as the viewer’s. In the theater strictly speaking, there can be no front light at all as it is the location, where the audience sits. Many theaters have a construction inbuilt into side boxes or side galleries in front of the proscenium arch. The position of 450 up from the horizontal line and roughly 450 to both the side from the central axis. These positions were the main technique in the 20th century as the faces of actors are lit favorably, but when the action moves into the forestage, some problems emerge as the it is difficult to lit the edge of stage without destroying the illusion of the proscenium arch by lighting it. At the same time, these positions cannot reach the depth of the stage. (State Opera in Prague)



1.2 Low light
“Trick or treat!”
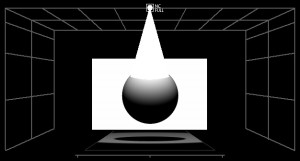
This might have been the first angle of artificial light experienced by early humans, gathered around a fireplace. Also, the earliest forms of theatre were lit up by candles located in front of the stage. By “low light” we usually understand low frontal lighting when the source is located on the floor in front of the object. Or even lower – under a grate or glass or on a lower structure. You can also achieve low light by reflecting light off the floor, this is a trick for extra points! Anyway, low light is every rigger’s favourite – they would just place the lantern on the floor, no climbing, no crawling, an easy job.

The direct low light causes distinctive shadows above the nose and brow ridges and the neck and edge of chin are highlighted. Modeling is considerable and quite rarely perceived in the real life and thus often used for creation of drama or scary effect, it creates unnatural shadows and a barrier that is erected between actors and audience, but that might be a wanted effect. Low front lights has the tendency to flatten the area, if used as the only one.This reversal of common angle has been used in kid’s games with flashlight and has an obvious effect.
 Low lighting is often used to give actor’s face a spooky look. Unnatural shadows above nose and brow ridges are very different from what we’re used under broad daylight or traditional interior lighting. Most golden-era horror movies are full of low light.
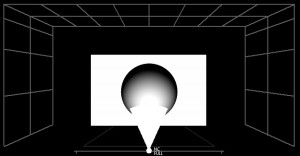
Lighting from below is rather uncommon and creates long shadows upwards and for that reason it is often used with special effects.


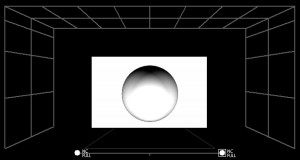
Low light is rather below the level of actor’s sight. (that might be at the trim of the ramp as was usual in the Baroque theatre). Floats were ramps with lights at the edge of forestage. In the premodern era, it was very common type of lighting, because of lack of other means.

Low light


1.3 Top light
“And the Lord smiled upon them.”
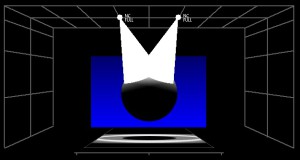
Top light, sometimes called down light. This is what you get when you stand under a streetlight or when you crawl through the canals and finally find that drainage grate. The source of light is right above the object, its shadow under it. As top light means a vertical beam of light, the effect is obvious – it gives the feeling of stillness, it can give the scene some extra “height”.

Lighting from above provides a dramatic effect and creates long shadows on the objects while leaving almost none at the surface of the floor. Down light (flood) induces the impression that the body is more massive that in reality, creates very short shadows on the ground and seemingly shortens the figure. Down light is also used to color the floor.
Theatre loves top light. It’s dramatic. It’s easy for actors to stand in it. If you add a bit of haze you’ll get this wonderful Finger of God – yes, this is what we talk about when we say “god light”. Seriously.
But there is a catch. Actually, quite a few. As human face is usually a more-or-less vertical surface, top light creates deep shadows and only a small tilt of actor’s head will make his/her face go black. Great actors and dancers can use this to their advantage. The rest will make you cry.
Also, top-light is not very tolerant to body imperfections as it shortens figure and makes every extra pound visible. That is not a problem with ballet but it can get quite scary when it comes to opera singers.




1.4 Back light
“Who’s there?”
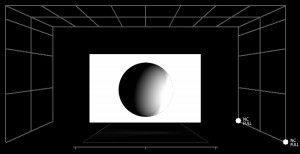
When the source of light is behind the viewed object, we call the situation “back light”. No matter if the source is above, below, bit sideways or right behind, it’s still back light and it’s beautiful. Back light does not reveal much of the object’s surface, you can only see its silhouette and a huge shadow in front of it.

Back light indicates the direction of the lighting from behind onto the object. It is possible to have a backlight at the backdrop, however, the backlight can be used in the middle of the stage, if the object is in front of the lantern. In back lighting as almost no light is cast onto the actor’s face, it is hardly visible, but silhouette is is very much highlighted. Contours provide a dramatic effect. Back lighting creates the largest contrast possible as it is directed against the eyes of a spectator. It creates a line of brightness along the object, while the object itself remains in dark. Shadows that are created all around the character might induce an unnatural atmosphere. It is used in combination with other lights to separate the figure from the background and so provide dimensionality to him.
Back light alone is enigmatic. You can see the characters, their movement and distinctive shadows but you can see their faces. Looking for a “dream” scene? Make it heavy on blueish back light and you’re all set.


But back light is the spice of every lighting setup. It is perfect to improve depth perception, to “cut out” an object out of its background. Back light is the solution when you want to add a colourful feel but keep the faces nice. Back light is the way to go when things just don’t look good enough.


This dance action is lit only by one lantern from the right rear. (photo by Anya Šebelková; performance Fox hunting / dance group EKS)


1.5 Side light
“Dance, little sister, dance…”
There’s a dancer on the stage and there’s a lantern to his left. Or right. One side you can see, the other is lost in darkness. This is side light.
If you add a lantern from the opposite direction, it is still side light and it looks even better. This is some real classic ballet lighting.

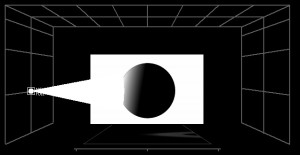
Side lighting from one side emits light from one side while the other remain in dark. Indicates the direction of the light from the side, usually 90 ° to the viewer position. Or from two sides. It creates an effect, where distinct shadows appear at the averted side of the face. The cheekbones cast shadow towards the nose as no light is shed onto the surface between cheekbones and nose. Modeling is so considerable, where the lit part of the figure emerge from the dark. Side lighting highlights sharp edges and is quite convenient for modeling of a body, especially for creation of strong shadows that highlight the volume. To strengthen the effect, the light of a complementary color could be used. Especially in ballet for these qualities, where the dancers body is the main mean of expression, highlighting the volume of the body is desired. It helps to perceive the depth of the space to the audience.
When you use side light from both sides you manage to light up whole object while still maintaining a peculiar play of shadows – as opposed to front lighting. This is most desired in dance, ballet especially. Side light highlights body’s volume and shape while it accentuates its movement. Using different, complementary colors from each side only strengthens this effect.
When you watch a side-lit face, you see distinct shadows appear and facial features come out stronger than ever. Absolutely great for photoshoots.






Side lighting: and back lighting separates the rear section from the actor.
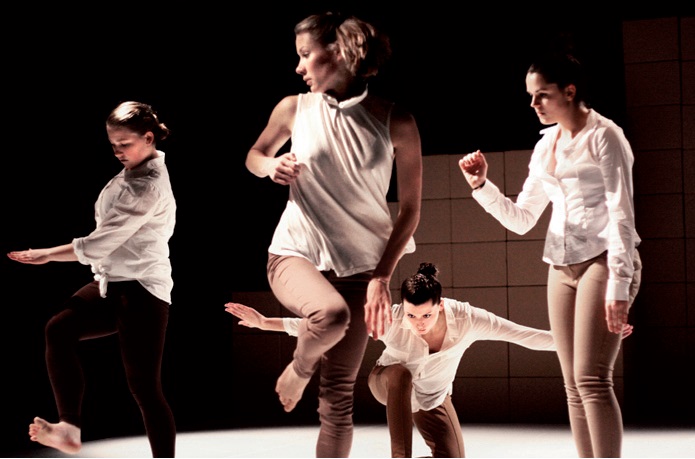
Dancers in this scene are lit by low-placed lanterns at the left side and one back light from the right rear corner; the image shows that the standing dancers have a direct source of light from the left , while the back light emits additional light onto them by reflection from white Baletizol – it is especially evident on the kneeling girl; this assymetrical lighting creates an effect of soft shadows on their bodies. (photo by Anya Šebelková ; performance Fox hunting / dance group EKS)
Rembrandt Self Portrait as a Young Man


