
Lesson 6
Lesson 6
To create fine lighting design, it is necessary to plan and communicate well. To be possible to rerun the performance or even to transfer it into another space, city or even country, it’s necessary to do the same thing– to create exact and correct documentation, in which no important detail would be omitted if possible.
Correctly made documentation that is intelligible for all involved is an important step to putting the entire lighting equipment into operation, correct focusing, precise setting of cues, shortly to perfect repetition of the original work of art – lighting design.
Sometimes the entire documentation can be composed of a single page of A4 format, other times, it can be a folder that is as thick as a book. Its content is especially the list of used devices, a map of positions of instruments, a plan of the focus of individual instruments and a list of cues. According to the type and complexity of the performance, there might be the need of other information, photos and pictures.
However, the main component – central point of the documentation- is the light plot.

1. Light plot
The light plot is actually a map that contains positions, number and type of used lighting instruments for the given lighting design, performance, concert, exhibition or whatever requires lighting. It can be made in the computer with the help of special 3D software, in the ordinary CAD program, with a pencil and pen on a drawing board, using templates and thin felt tip pen, or even with a pen on the paper bag for snack.
Its purpose is to unambiguously and effectively hand over the information. It isn’t important how it is created; there is neither any universally accepted “only correct” format. The only important issue is that all the future users will understand it, which means those who will work with it. Let it be technicians who are going to hang the individual fixtures, main electrician who is going to be responsible for the entire set up and light designer himself who is going to handle the performance itself. The light plot should be clearly arranged and most importantly, provided with the Key and Legend, according to which anybody can read and interpret the light plot well, no matter what method is used for its drawing.
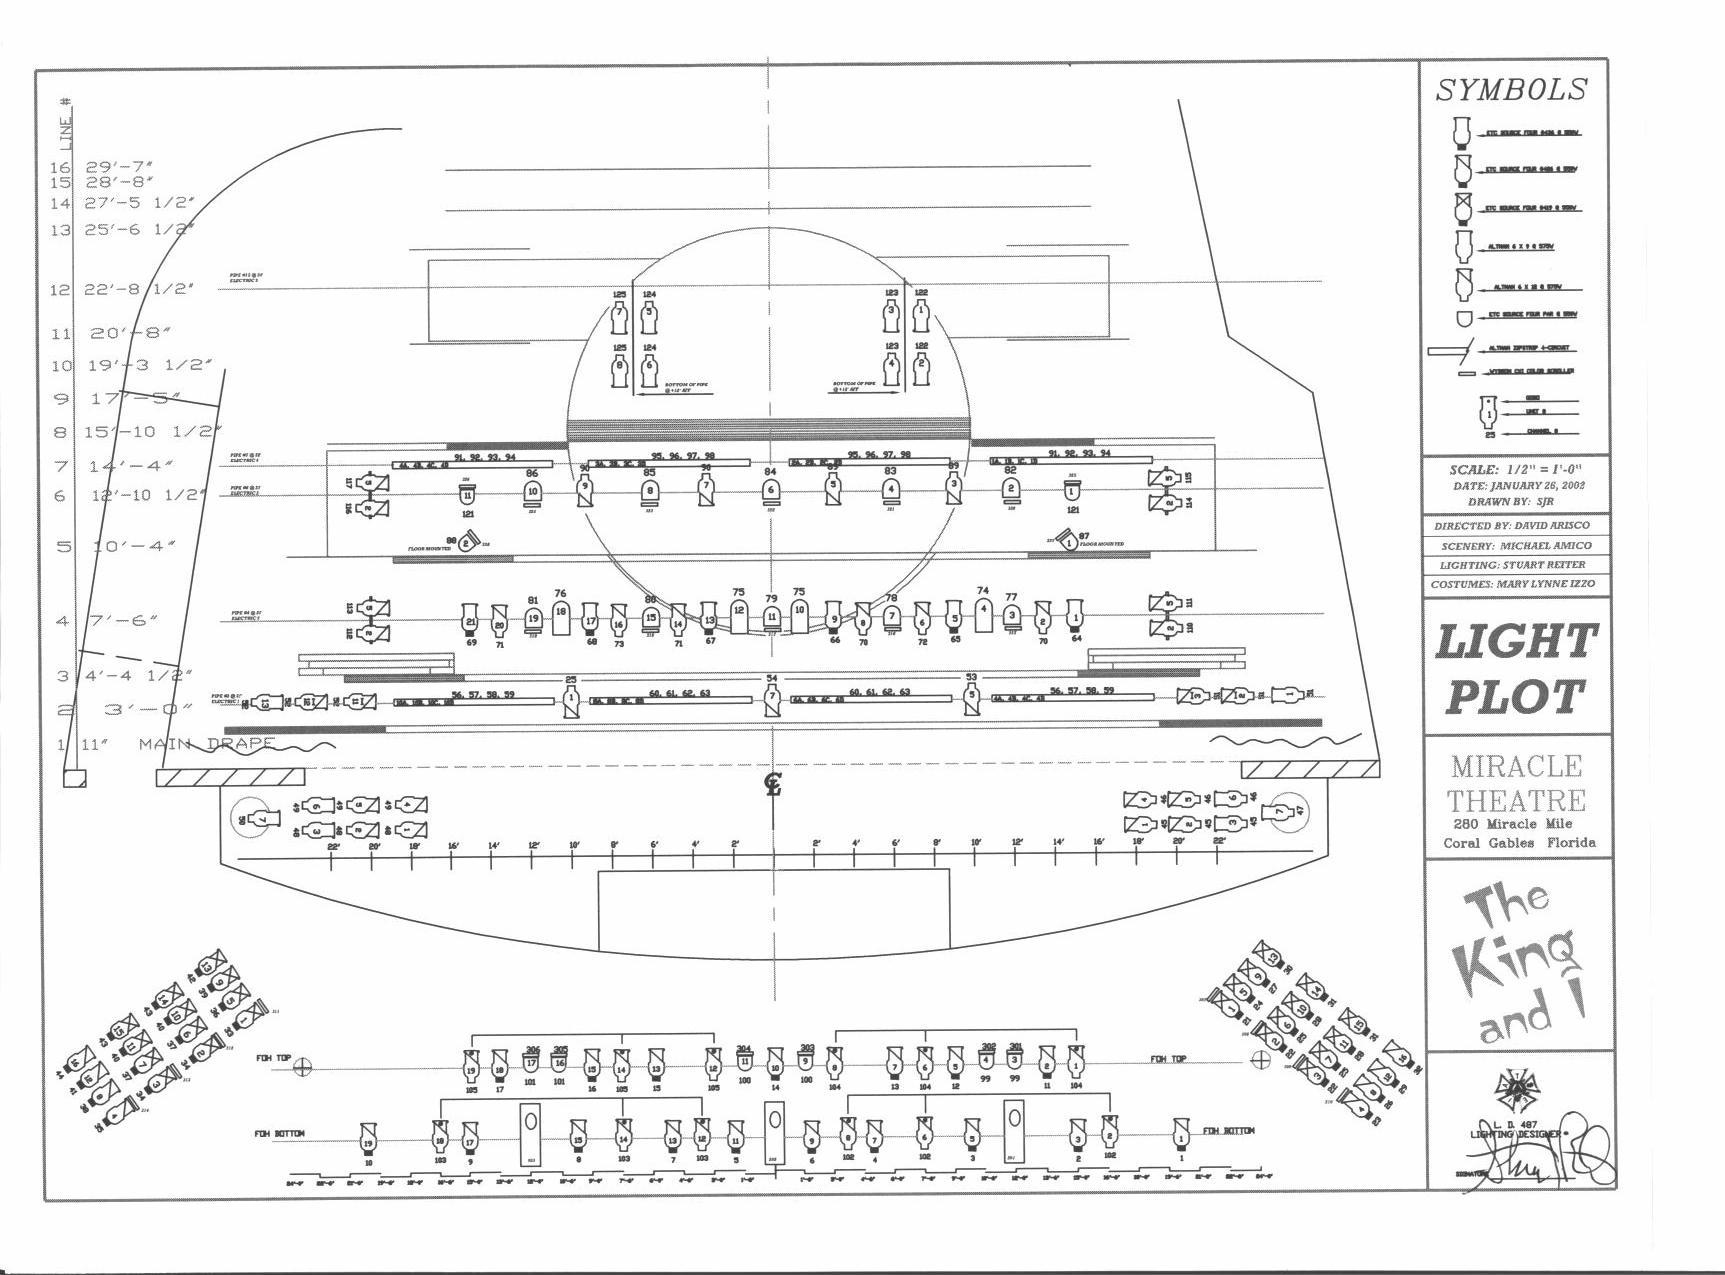
Let’s have a look at one large light plot to a musical. We can see a chart of all hanging instruments. This light plot certainly has other pages as well where lights that are fixed in the scenery set would be drawn as well etc. Let’s focus now only to this most extensive and most important part.


A comprehensive light plot for large musical production that contains all the elements necessary for precise operation of all the lighting instruments that is to perfect repetition of the original lighting design. Note the frame around the entire plan. This secures that all its users can be sure that they have it complete and that no piece of it hasn’t got lost for instance during printing.
1.1 Information
The name of the performance, specific space for which is the set up designed, premiere date, creators – this is very important information as well. There is also the scale, in which the light plot is drawn. According to it and by using a ruler, it is easy to find out also the distances that are not stated at the plot. Further, the number of the second plate out of three and a note ’over stage’, which indicates that this is only a part of the whole light plot. At the other pages, there will be certainly instruments installed into the set etc. that wouldn’t fit into the plot or that would have made it unclear.


What should a light plot contain?
-The type of the plot – it is the single one, or there are other with more detailed information?
-Date and number of the version
-Authorship
-Dimensions
-Main elements at the stage
-Heights – supplement of a section, where the altitude of positions is available.
-Contact information
-Measure
-Date
-Software
1.2 Key

The lighting instruments are represented by symbols in the light plot. The Key shows clearly, which symbol stands for what. Furthermore here, there is shown in the right column, how many lighting instruments are used, which is great help from the creator of the light plot to anybody who for instance was about to order lighting devices.


The key clarifies the meaning of all the numbers, which appear at the light plot in connection to individual devices.

There is an auxiliary measuring scale at the bottom of the image. It is available at the light plot at the bottom as well as at the top. Using a ruler, laid to the plot and linking both the measures, it is easy to calculate the exact position of individual instruments.

A detail of the plot, where numbering of individual lighting instruments can be seen. Each hanging position has its name. Here, the fly bars of hanging lights are named as 1st electric, 2nd electric etc. – numbered from the auditorium towards the rear. Each instrument at each bar has its own number, here numbered from right to left. If each of instruments has a clear indication that is composed of position and number, it is possible to work better with it, simply everybody knows, which instrument is being talked about. Further, it is clear from the image, how high and on which fly bar the individual instruments are hanging. Notice as well that they are not plotted precisely at their respective positions because of shortage of space. The position of hanging is determined by red line. And that is indicated in the note.

A side boom is drawn here as if it would lie on the ground in the way that all the instruments would be visible in the ground plan, which are one above the other in the reality. Furthermore, there is a note at each of them how high it is located above the stage.


This is how there are drawn the exact positions in the plot, where booms stands and ladders hangs. Mounting of the booms and ladders themselves is drawn at the plot wherever there is place and is connected to the exact position with an arrow. In such a way, position and content is drawn in a clear and unambiguous manner.

Ladders

Note that an approximate direction of each instrument is marked in the plot as well. That enables correct hanging and then subsequently makes the focusing itself easier.

The positions of set pieces are drawn here at the plot by thin gray line. And in a table, there are written numbers of fly bars and their mounting. Also scenery, legs, borders, which might have significance for hanging and focusing the lights.


The light plot contains other notes as well, which are indispensable for a correct set up or focus respectively.



1.3 Templates
Original templates of various manufacturers. The symbols of lighting instruments are drawn in a scale.


Ordinary templates, which can be used for drawing a light plot. It’s just sufficient to imagine that a circle would be a symbol for a Fresnell and a square for a profile. It’s quite arbitrary. It’s only important to describe well the symbols in the legend.


1.4 Examples

A manually made, quickly drafted light plot for the theater Alfred in the Courtyard. Nor heights neither distances are plotted on the picture. The plan serves for quick orientation and was sufficient enough for a fast set up at the place in the presence of the lighting designer.

Almost a comical light plot, which arrived by a fax from a performer. Despite of it, it served well for the set up and a good performance came into existence on its basis.

A terrible light plot, serving only to quick registering of a position and connection of instruments. It’s sufficient for orientation for a lighting technician during touring and with a minimum of time, not for the future existence of the performance.

A detail of a light plot, drafted manually by a pencil with help of templates and outlined by a pen, including dimensioned pitches, numbers of devices and numbers of channels.

A light plot, created in the drawing program Coreldraw, where the author created the symbols of lighting instruments according to the FIELD templates so he can process light plots digitally, without using specialized software.

A light plot, created in the old version of CAD program. Symbols are a part of the library in the program. It’s actually still a sort of “drawing to the template”, only in a digital way.

Creation of a light plot in the program Vectorworks. Specialized programs contain libraries of almost all manufacturers of lighting instruments, some can automatically count the number of circuits, input, list of instruments etc. At giant shows, it’s an invaluable auxiliary, which can do a lot of boring work instead of a lighting designer.

Creation of a light plot in a special program White CAT.
Mamma Mia
A light plot for the touring version of the performance Mamma Mia, which was created in the program VectorWorks. At a closer look, one is amazed by the quantity of details, notes, information about the focus, colors of scrollers, further details about hanging, etc. A section of the theatre is also a part of the plot, where it is possible not only to count individual heights of fly bars, but also angles, under which the spectators would watch the performance from individual floors of the auditorium and their “contact” with the lighting technology.

The light plot of the performance Mamma Mia.


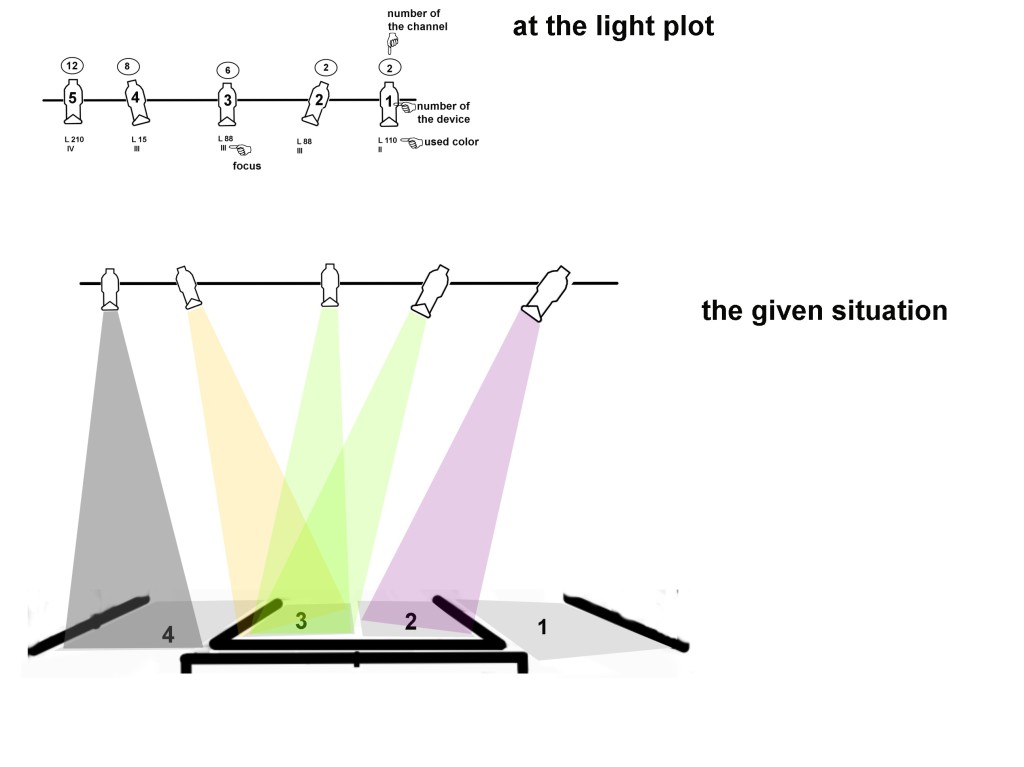
TThis light plot provides a letter that denotes its focus at each instrument. The plot is divided into individual sections that are marked by the respective letters. Thus this light plot becomes to be a focus sheet, another piece of documentation, which will be the topic of the next section.

Profile ETC, which has not only the color of the filter (R54) marked in front of the lens, but the direction of focus (G) as well.

Sections of the stage divided by letters. Here, the sector G is visible, into which the profile would be directed.

An example of a complete light plot. Ponec Theater, Prague.

A light plot of the Estates Theatre in Prague.


